
Stop Wasting Hours on Scratch Assays – Get It Right the First Time
The scratch assay—also called the wound healing assay—is the most accessible in vitro method for studying directional cell migration. By creating a cell-free "wound" in a confluent monolayer and monitoring its closure over time, researchers can quantify how cancer cells metastasize, how endothelial cells repair tissue, or whether a drug candidate inhibits migration. Yet despite its simplicity, one overlooked step can render an entire dataset irreproducible.
This guide walks through the complete protocol, the critical technical nuances that separate publishable data from experimental noise, and the quantitative workflow needed to turn microscopy images into robust migration metrics.
What the Scratch Assay Actually Measures?
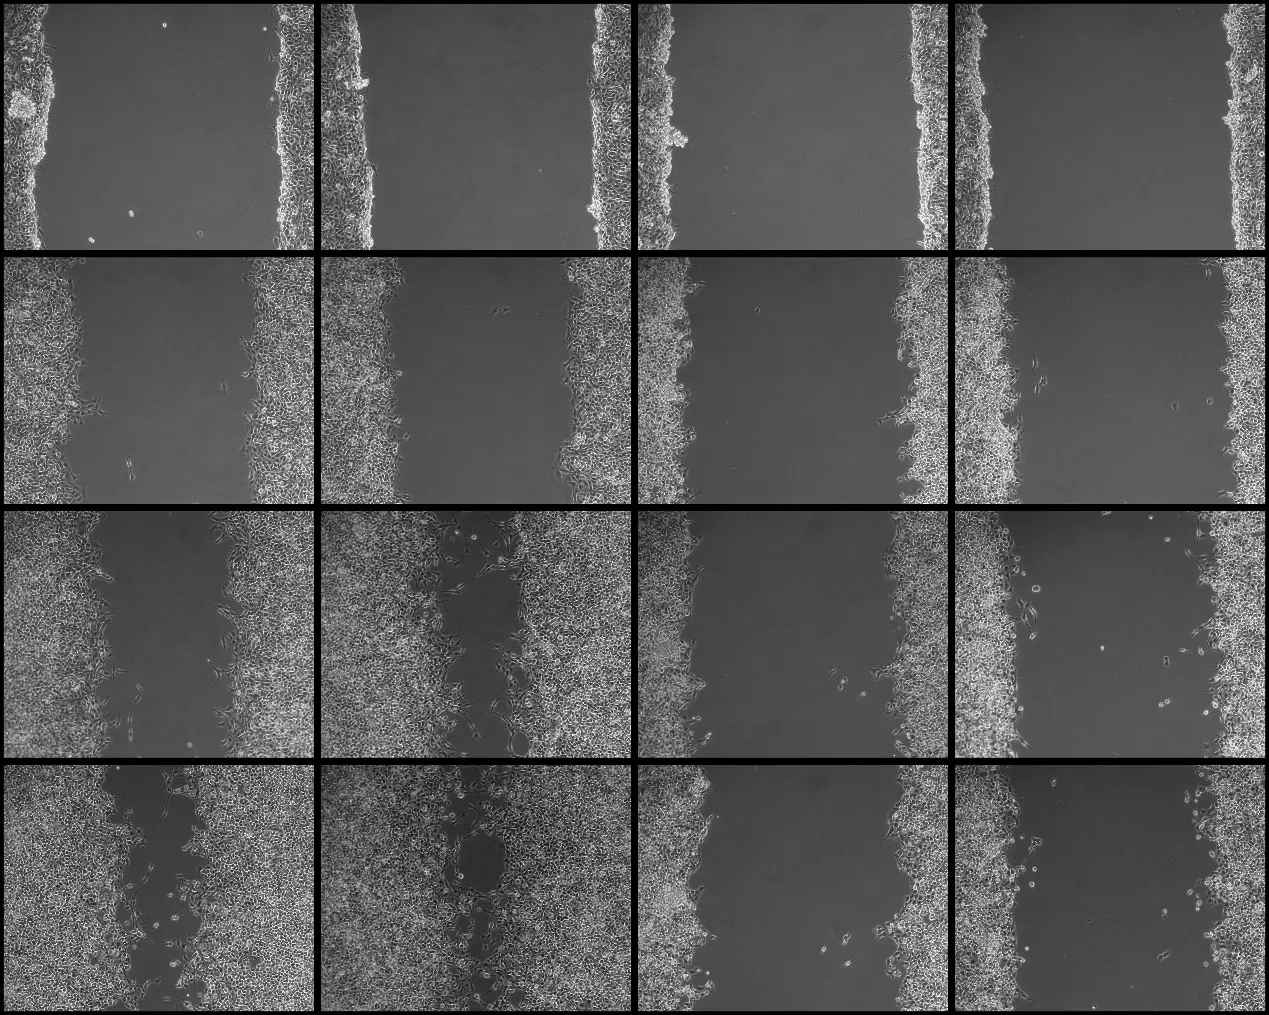
The assay mimics in vivo wound closure. A uniform gap is introduced into a 100 % confluent monolayer of adherent cells. The cells at the wound margin then polarize, extend lamellipodia, and migrate into the cell-free zone to re-establish cell–cell contacts.
By capturing images at defined intervals (e.g., 0 h, 6 h, 12 h, 24 h) and measuring the remaining wound area, you calculate the migration rate:
A drug that inhibits migration leaves a larger residual wound; a pro-migratory stimulus accelerates closure.
Pre-Experimental Preparation: Setting Up for Success
Cell Seeding
Use cells in logarithmic growth phase—senescent or over-confluent cells exhibit reduced motility and will bias results downward. Seed into 6-well plates (or 12-well plates for higher throughput) so that the monolayer reaches 100 % confluence on the day of scratching. A sparse or patchy monolayer will produce irregular wound edges and non-directional migration.
The Scratch Tool: Pipette Tip vs. Culture Insert
- Manual method: A sterile 200 µL pipette tip. Keep the tip perfectly perpendicular to the plate bottom, apply uniform pressure, and draw a single continuous line without pausing or backtracking. Support your elbow to stabilize hand movement.
- Precision method: Silicone culture inserts (e.g., 2-well or 3-well removable barriers). Cells are seeded into adjacent chambers; upon insert removal, a gap of defined width (typically 500 µm) with razor-sharp edges is exposed. This eliminates operator-dependent variability in wound width and prevents damage to the plastic substrate or surface coating.
Reference Marking (Critical)
Before scratching, draw parallel alignment lines on the underside of the plate with a permanent marker, spaced ~0.5–1 cm apart. These landmarks guarantee that every time-lapse image is captured at the identical field of view. Without this step, comparing 0 h and 24 h images become impossible.
Step-by-Step Protocol
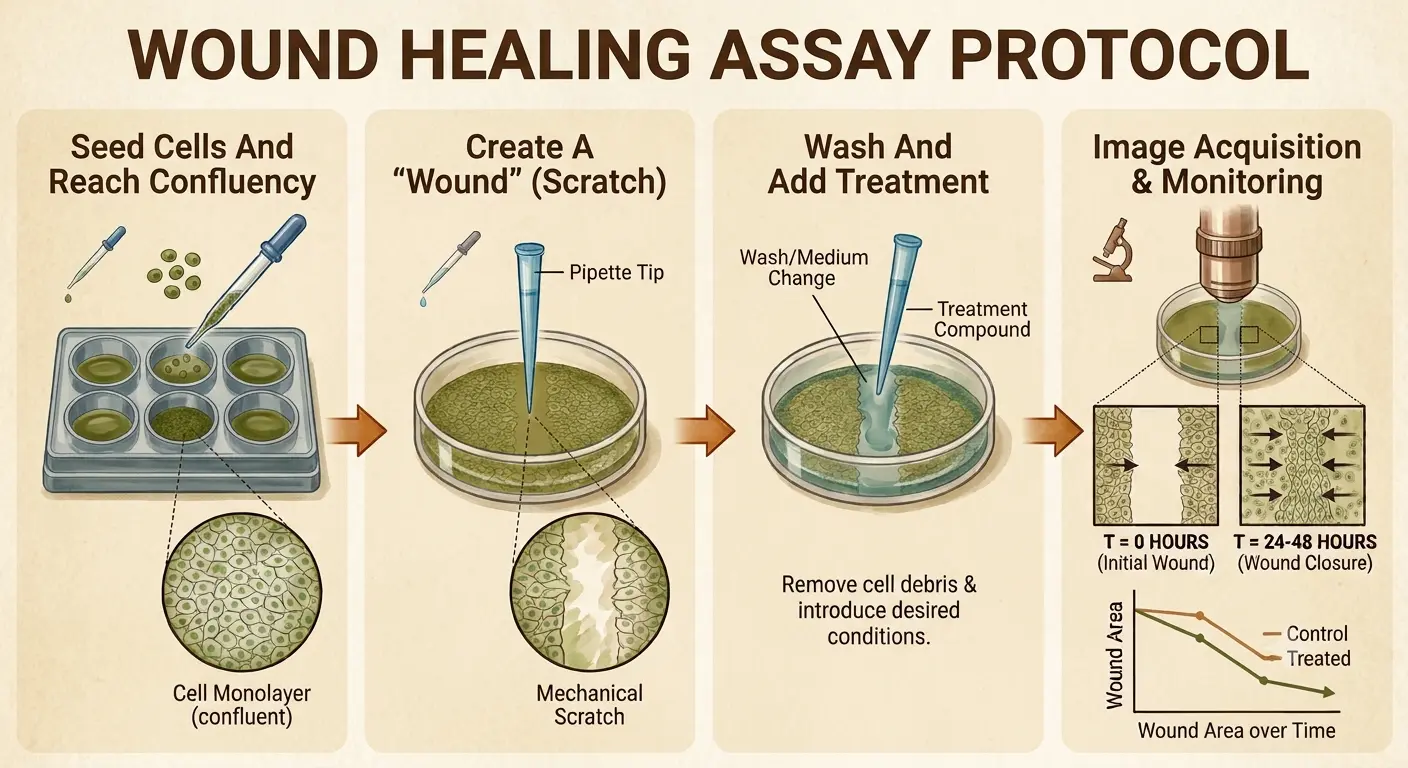
1. Create the Wound
Align the pipette tip perpendicular to the marker lines and scratch in one smooth motion. If using inserts, gently lift them with sterile tweezers after confirming confluence.
2. Wash Away Debris
Gently rinse the well 2–3 times with PBS to remove detached cells and cellular debris. Critical: Direct the PBS stream against the well wall, not onto the monolayer surface, to avoid dislodging cells at the wound margin. Residual debris can re-adhere, proliferate, and artificially accelerate wound closure.
3. Add Low-Serum Medium
Replace the medium with serum-free or low-serum (< 2 %) medium containing your test compound or vehicle control.
Why low serum? Serum contains growth factors that drive cell proliferation. The goal is to measure migration, not mitosis. Suppressing proliferation ensures that gap closure reflects cells moving into the wound rather than dividing in situ.
If your experimental design absolutely requires serum, pre-treat cells with mitomycin C to arrest the cell cycle without affecting viability.
4. Acquire the 0 h Baseline Image
Place the plate under an inverted microscope, locate the intersection of your reference lines, and capture bright-field images at a magnification that frames the entire wound width (typically 4× or 10×). Record the exact coordinates for revisit.
5. Incubate and Time-Lapse Imaging
Return the plate to the incubator (37 °C, 5 % CO2). At predetermined time points (commonly 6 h, 12 h, and 24 h), retrieve the plate and re-image the same coordinates. If the medium turns acidic (yellow), perform a gentle medium exchange before imaging.
6. Quantification
Import images into ImageJ (or equivalent software). Use the "Polygon" or "Freehand" selection tool to trace the cell-free area at each time point. Calculate the migration rate using the formula above. For higher throughput, automated wound-healing analysis plugins (e.g., Wound Healing Tool for ImageJ) standardize area measurements and reduce operator bias.
Troubleshooting
| Root Cause | Solution | |
|---|---|---|
| Irregular wound edges | Inconsistent tip pressure or angled scratching | Use culture inserts; if using a tip, keep it vertical and move in one fluid stroke |
| Cells detaching at the margin | Overly vigorous PBS washing | Wash gently by streaming PBS down the well wall; alternatively, aspirate old medium and slowly add fresh PBS |
| Wound fully closed at 24 h | Excessive cell proliferation or overly fast migration | Shorten the observation window or reduce serum further; use mitomycin C if necessary |
| Cannot relocate the same field | Failure to mark the plate bottom | Draw intersecting lines with a permanent marker before scratching |
| Proliferation confounding migration | Serum-containing medium stimulating division | Use ≤ 2 % serum or serum-free medium; add mitomycin C as a proliferation block |
When to Upgrade Beyond the Classic Scratch Assay
While the manual scratch assay is cost-effective, it has inherent limitations: wound width varies with operator force, the plastic substrate can be damaged, and dislodged cell clumps may interfere with migration kinetics.
For studies demanding higher reproducibility or throughput, consider:
- Cell exclusion zone assays with silicone stoppers for precise, damage-free gaps.
- Oris™ cell migration assays for standardized detection zones compatible with automated imaging.
- Boyden chamber (Transwell) assays to study chemotaxis toward a chemoattractant gradient, decoupling migration from proliferation entirely.
- Live-cell microscopy with fluorescence labeling for real-time single-cell tracking.
Outsource with Confidence: Professional Cell Migration Services from Creative Bioarray
Running a flawless scratch assay requires meticulous technique, specialized imaging infrastructure, and hours of manual image analysis. For drug-discovery campaigns, large compound libraries, or studies requiring statistically powered replicates, outsourcing to a specialized CRO can accelerate timelines and eliminate batch-to-batch variability.
Creative Bioarray offers a comprehensive portfolio of cell migration and invasion assay services tailored to your research goals:
- Scratch (Wound Healing) Assays — performed with validated cell lines and standardized protocols, delivering quantitative wound-closure metrics with high reproducibility.
- Cell Exclusion Zone Assays — utilizing removable silicone stoppers to create damage-free, precisely defined cell-free zones for robust migration quantification.
- Oris™ Cell Migration Assays — ideal for high-content screening with automated detection zones and minimal edge artifacts.
- Boyden Chamber / Transwell Assays — quantitative chemotaxis and haptotaxis analysis without proliferation interference, available in 24-well and 96-well formats.
- Fluorescent-Labeled Cell Migration Assays — real-time path tracking and single-cell mobility analysis via high-throughput live-imaging systems.
With access to an extensive repository of authenticated cell lines, GLP-compliant workflows, and advanced high-content imaging platforms, Creative Bioarray transforms routine migration screening into publication-ready datasets.
Ready to eliminate technical variability from your migration studies? Contact Creative Bioarray today to discuss customized assay design, compound screening, or cell-line sourcing—and keep your team focused on the biology, not the benchwork.
Your email address will not be published. Required fields are marked *