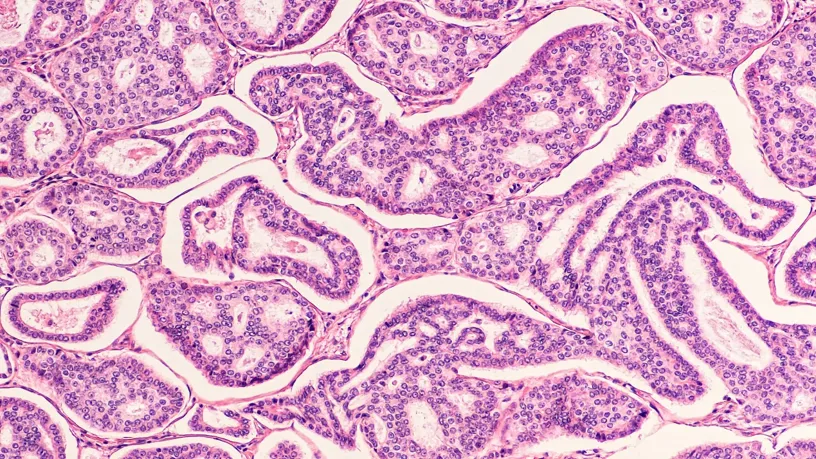
5 Steps to Better HE Staining
HE staining is the most fundamental and core technique in pathological diagnosis and basic research. High-quality slides require clear contrast between cell nuclei and cytoplasm, a clean background free of impurities, and clearly discernible tissue structures. However, problems such as slide detachment, gray staining, and blurred nucleoplasmic boundaries frequently occur. Most failures are not due to a lack of understanding of the principles, but rather insufficient control over the details of key steps.
1. Baking and Dewaxing: Preventing Uneven Staining from the Source
Baking and dewaxing are the first hurdles in HE staining. Defects in this step will directly lead to subsequent staining failures, which are difficult to remedy through subsequent steps.
The core of baking is to ensure full adhesion between the tissue and the slide, while thoroughly removing moisture from the paraffin. Standard procedure requires baking the slide in a 65°C oven for 40 to 60 minutes. Too low a temperature or insufficient time will result in insufficient tissue adhesion, making it easy for the slide to detach during staining; too high a temperature will denature tissue proteins, causing staining rejection and ultimately resulting in blurred staining. After baking, the slides should be immediately immersed in xylene to prevent the wax from re-solidifying and affecting the dewaxing effect.
The key to dewaxing is to thoroughly remove paraffin from the tissue surface and interstitial spaces. A double-cylinder xylene treatment is recommended, with each immersion lasting 12 minutes. If the room temperature is below 20°C, the xylene immersion tank should be heated to 30°C; otherwise, incomplete dewaxing may occur, resulting in white spots or uneven, hazy staining on the slides. Xylene needs to be filtered and replaced regularly; xylene that has been used for too long will become ineffective due to excessive dissolution of wax. It is also important to avoid introducing xylene into the subsequent ethanol gradient to prevent the formation of a cloudy background.
After dewaxing, a gradient hydration process is required, immersing the slides in the following order: 100% ethanol double-cylinder, 95% ethanol, 85% ethanol, and 75% ethanol, for 3 to 5 minutes each step. Finally, rinse with distilled water. Incomplete hydration will prevent hematoxylin from effectively binding to the cell nucleus, directly resulting in pale nuclear staining.
2. Hematoxylin Stain: State Control Determines Nuclear Color Quality
The effectiveness of hematoxylin staining hinges on the precise matching of the stain's activity state with the staining time, rather than simply extending the staining duration.
Hematoxylin stain easily loses its activity due to oxidation, resulting in a grayish-blue stain with a bright crystalline oxide film on the surface. If this oxide film adheres to the tissue, it will form difficult-to-remove spots. Therefore, it must be filtered with qualitative filter paper before each use, and the stain should be replaced immediately if significant fading occurs.
The staining time needs to be dynamically adjusted based on multiple factors. The staining time for fresh hematoxylin is typically 2 to 5 minutes. In winter, when room temperature is low, this can be extended to 5 to 8 minutes. For densely cellular tissues such as lymph nodes, the time can be shortened appropriately, while for fibrous tissues, the time needs to be extended. Section thickness also affects the staining effect; a section thickness of 4 to 5 μm is optimal. Excessively thick sections will lead to uneven dye penetration and inconsistent nuclear staining depth.
Thorough rinsing with running water after staining is essential. It is recommended to rinse for 2 to 3 minutes with running water to remove unbound stain from the tissue surface, preventing non-specific staining in subsequent differentiation steps and laying the foundation for accurate differentiation.
3. Differentiation and Blue Reversal: The Core Control Point for Nuclear-Cytoplasmic Separation
Differentiation and blue reversal are crucial steps determining nuclear-cytoplasmic contrast and are the most demanding aspects of HE staining. Over-differentiation or insufficient blue reversal will lead to staining failure.
The purpose of differentiation is to remove excess hematoxylin from the cytoplasm, making the nucleus clearly visible. The commonly used 1% hydrochloric acid ethanol differentiation solution should be applied for several seconds to 30 seconds. The specific duration needs to be adjusted according to the tissue type. Differentiation time is shorter for parenchymal organs such as the lungs, liver, and kidneys, and can be appropriately extended for lymphoid tissues such as the spleen. The timing of differentiation termination cannot be judged solely by experience; it must be observed under a microscope. When the cytoplasm is essentially colorless and the nucleus is purplish-red, immediately rinse with running water to terminate differentiation. Over-differentiation will result in pale nuclear staining. In this case, hematoxylin staining can be repeated, followed by re-differentiation. Do not proceed directly to subsequent steps.
The core of blue reversal is to convert hematoxylin, which is red under acidic conditions, to blue under alkaline conditions, thus enhancing the contrast between the nucleus and cytoplasm. Immediate blue staining is necessary after differentiation. This can be achieved by soaking in 0.2% ammonia solution for 30 seconds to 2 minutes, or rinsing with running water for 10 minutes. Insufficient blue staining will result in a brown nucleus with an indistinct boundary between the nucleus and cytoplasm; excessive blue staining will cause the cytoplasm to turn blue, interfering with eosin staining. After blue staining, the cells must be thoroughly rinsed with distilled water to remove any residual alkaline solution and avoid affecting the eosin staining effect.
4. Eosin Counterstaining: Precise Control to Avoid Background Interference
The core of eosin staining is to achieve uniform staining of the cytoplasm while avoiding background contamination. The key lies in the coordination between the staining solution maintenance and dehydration steps.
Eosin staining solutions are divided into water-soluble and alcohol-soluble types. In research, alcohol-soluble eosin staining is commonly used, with a staining time of 1 to 3 minutes. After staining, a rapid rinse with 95% ethanol is necessary to remove excess staining solution. The pH of eosin staining solution significantly affects the staining effect and needs to be checked and adjusted regularly. Insufficient acetic acid content will lead to weak cytoplasmic staining, making it prone to destaining during subsequent dehydration steps. Similar to hematoxylin, eosin staining solution also needs to be filtered regularly to remove flocculent precipitates and prevent background spots.
Incomplete dehydration is the main cause of gray background staining after eosin staining. After eosin staining, the tissue should be immersed in anhydrous ethanol, 95% ethanol (double bath), and 100% ethanol (double bath), for 1 to 2 minutes in each bath to ensure no residual water remains in the tissue. If a white haze appears after immersion in xylene, it indicates incomplete dehydration, and the tissue must be immediately returned to anhydrous ethanol for re-dehydration; otherwise, the tissue structure will be blurred after mounting, rendering the entire process useless.
5. Clearing and Mounting: Guarding the Final Quality Checkpoint
Although clearing and mounting are at the end of the staining process, they directly determine the observation effect and shelf life of the sections. Even minor negligence can render all previous efforts futile.
The core of clearing is replacing the ethanol within the tissue with xylene, achieving optical transparency. A dual-tank xylene treatment is recommended, with each tank soaking for 1-2 minutes. Insufficient clearing leads to uneven refractive index, resulting in blurred layers during microscopic observation. Strictly avoid drying the sections during the procedure; exposure to air for more than 30 seconds will cause tissue shrinkage and deformation, creating air bubbles that cannot be repaired by subsequent steps.
The key to mounting lies in the concentration of the neutral resin and the technique used. If the resin is too thin, it will overflow and form bubbles after drying; if it is too thick, it will be difficult to spread evenly. It is recommended to dilute the resin with a small amount of xylene to reduce viscosity. When adding the resin, it must accurately cover the tissue area, avoiding excessive or insufficient application. The coverslip should be pressed slowly and vertically to expel air bubbles, maintaining downward pressure for 10 seconds to prevent resin shrinkage. After mounting, allow the slide to dry completely to prevent tissue displacement or bubble formation. Label the dried sections and store them in a dark place.
Outsource Histology With Confidence
From routine histology and special staining to immunohistochemistry (IHC), immunofluorescence (IF), and medical device histopathology, Creative Bioarray delivers clean, consistent slides your team can trust.
| Services | Highlights |
|---|---|
| Routine Histology | Processing, embedding, sectioning, and H&E staining with rigorous QC. |
| Special Staining | Creative Bioarray offers special staining designed to reveal structures/microorganisms not readily seen with H&E-using standardized protocols, high-quality reagents, regular equipment maintenance, and rigorous QC with positive/negative controls. |
| Immunohistochemistry/Immunofluorescence (IHC/IF) | Our IHC and multiplex IF stain services are tailored to your study's specific markers and tissue types, delivering high-quality staining and reproducible results. |
| In Situ Hybridisation (ISH) | For researchers exploring gene expression or the tumor microenvironment, our ISH, TUNEL, and multiplexing solutions provide precise localization and quantification, supported by expert pathologist review or automated image analysis. |
Your email address will not be published. Required fields are marked *